

-
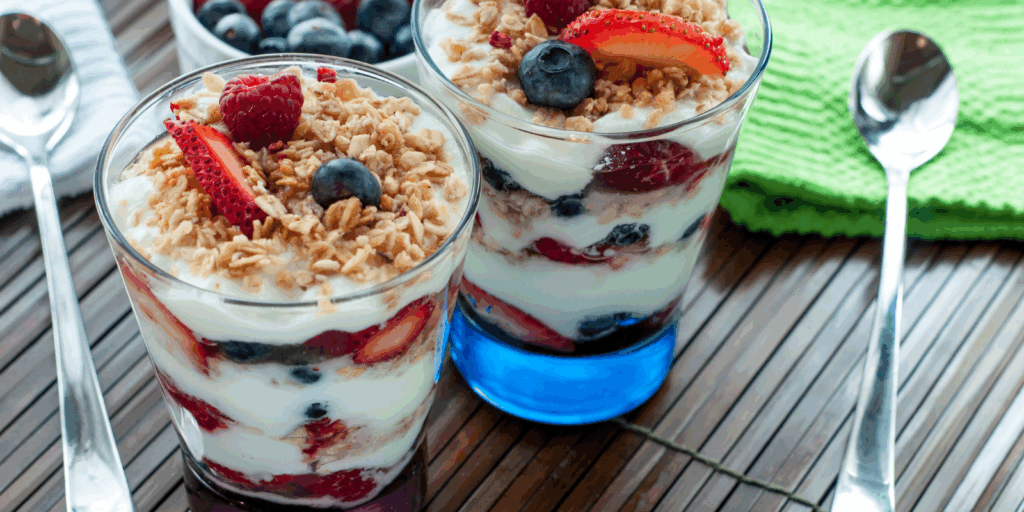
Layered Love: Yogurt Parfait Cups for Kids
Ah, the after-school snack hustle! You open the fridge, and suddenly it’s a scene straight out of a cartoon, with kids rushing in like they’re part of a grand food parade. “What’s for snack, Nonna?” they ask, eyes gleaming. I know just the thing to keep those little tummies happy and healthy: Yogurt Parfait Cups! These delightful, layered treats are not just a feast for the eyes; they’re also a chance for your grandkids to flex their creative muscles in the kitchen. Plus, if you’re looking to avoid dairy, we’ll chat about some fantastic yogurt alternatives too. Let’s get started!
What You’ll Need: Ingredients
Gather ‘round, my little chefs! You won’t need a treasure map to find these ingredients:
- 1 cup plain or lightly sweetened Greek yogurt (vanilla flavor is always a crowd-pleaser!)
- 1/2 cup fresh berries (strawberries, blueberries, or whatever looks good at the market)
- 1/4 cup granola (get the crunchy kind—no soggy parfaits on my watch!)
- A drizzle of honey (optional, but let’s be real—we all love a little sweetness)
Yogurt Alternatives:
For those who want to skip the dairy, here are a couple of wonderful yogurt alternatives that you can use:
- Coconut Yogurt: Creamy and tropical—great for a fun twist!
- Almond Milk Yogurt: Light and slightly nutty; it pairs wonderfully with fruits.
The Art of Making Yogurt Parfait Cups: Instructions
- Layer It Up: Grab a clear cup or small jar (they’re more fun when you can see all the pretty layers!). Start with a spoonful of yogurt at the bottom.
- Add Berries: Toss in a handful of fresh berries on top of the yogurt. Choose a mix for color and flavor—just like a rainbow in a cup!
- Sprinkle Some Crunch: Next, add a layer of granola for that satisfying crunch. Not too much, though; we don’t want it to overshadow the stars of the show!
- Repeat the Layers: Go back to the yogurt, then berries, and granola again—keep layering until you reach the top of your cup. Talk about a delicious tower of goodness!
- Finish with a Drizzle: If you’ve got some honey on hand, a quick drizzle on top adds that touch of sweetness.
- Serve and Enjoy: Bring it to the table, and watch those happy little faces devour it like it’s dessert!
Nutrition Breakdown:
Now let’s peek at what’s creating all that yumminess:
- Yogurt: Packed with probiotics, protein, and calcium, yogurt is fantastic for healthy bones and those little tummies!
- Berries: Bursting with vitamins, fiber, and antioxidants, berries are nature’s candy—sweet with a side of health!
- Granola: Depending on the type you choose, granola can offer whole grains and added fiber. Plus, who doesn’t love that crunch?
- Honey: If you choose to use it, honey adds a natural sweetness that many kids love, but you can skip it if you’d prefer to keep things lower in sugar.
Involving the Kids: Let’s Get Creative!
Here’s the best part: this is where all the fun happens! Involve the little ones, and let them shine:
- Personalized Parfaits: Have them choose their yogurt flavor, berries, and toppings. Everyone loves a snack that’s uniquely theirs!
- Decorative Cups: Get out those craft supplies! Let them decorate their cups with stickers or drawings to add a personal touch.
- Layering Competition: Who can make the tallest parfait? Set a little challenge—it’s all in good fun, and you’ll end up with delicious results.
- Taste Test: If you’re feeling adventurous, set out different yogurt alternatives and let the kids taste and compare them. You might discover a new favorite!
Final Thoughts: Snack Time Bonding
At the core of every good snack is the joy of sharing and creating together. The Yogurt Parfait Cups are not only a nutritious option but also a canvas for your grandkids’ creativity. Each cup is a reflection of them—and let’s be real, it’s a great way to get some fiber and protein into those little ones without them even realizing it!
So grab those cups, start layering, and create some sweet memories that will last long after the parfaits are gone. Happy snacking, my friends!
Call to Action
If you enjoyed these adorable Yogurt Parfait Cups, head back for more kid-approved snacks that combine fun and nutrition! Snap a photo of your parfait creations and tag me—I can’t wait to see your masterpieces!
-
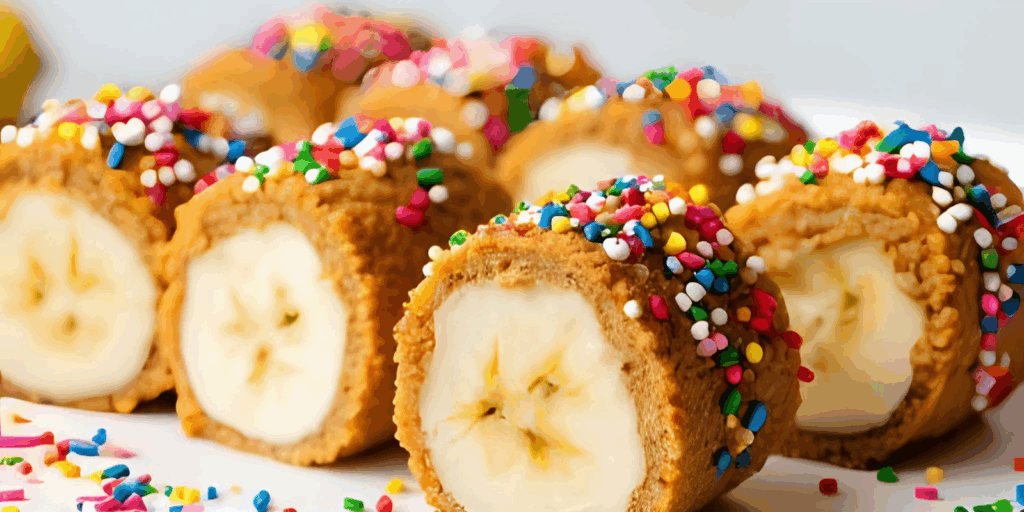
Let’s Roll with Banana Sushi Rolls: A Fun and Healthy Snack
What You’ll Need: Ingredients
Ah, snack time—it’s a jungle out there! One minute you’re lounging in your favorite chair, and the next, the grandkids are piling into your kitchen like they’re after the last cookie on Earth. Fear not, my dear friends, for Nonna has got the perfect solution to turn that chaos into creativity: Banana Sushi Rolls! These little beauties are not just a treat but also a way to sneak in some healthy ingredients while letting the kids have a blast in the kitchen alongside you. So, grab your aprons and let’s get rolling!
Let’s not complicate things with a grocery list that looks like a novel. Here’s what you need to whip up some Banana Sushi Rolls:
- 2 ripe bananas (the riper, the sweeter!)
- 2-3 tablespoons nut butter (choose your favorite: peanut, almond, or sunflower—no judgment here) Nonna suggestion: try Nutella or flavored whipped cream cheese in place of nut butter
- Toppings: Now here’s where you can get creative! You can use:
- Mini chocolate chips
- Crushed nuts (the naughty ones will make you feel like a professional chef)
- Coconut flakes
- Chia seeds
- A sprinkle of cinnamon (because we’re fancy like that!)
The Magic of Making Banana Sushi Rolls: Instructions
- Get the Bananas Ready: Peel your bananas. It’s like unwrapping a present, only it’s food and won’t break the bank if the kids get a little wild.
- Spread the Nut Butter: Take your favorite nut butter and smear it all over the bananas like you’re buttering a piece of toast. Don’t skimp—go for a generous layer because we like to live on the edge!
- Roll in the Goodies: Now for the fun part! Choose your toppings and roll the bananas in them. Whether it’s a dusting of cinnamon or a shower of chocolate chips, let the kids have at it.
- Slice ‘Em Up: Using a sharp knife (but not too sharp or you’ll scare the little ones!), cut the coated bananas into bite-sized pieces. You can even freeze them if you want a delightful frozen snack!
- Serve and Enjoy: Arrange them on a plate and enjoy your masterpiece! It’s a snack that’s almost too cute to eat, but you’ll find a way, trust me.
A Peek at the Nutrition
Now, let’s get down to brass tacks. What’s going in these delightful rolls?
- Bananas: Rich in potassium and fiber, they help keep little energy balls bouncing off the walls (and keep you from worrying about them crashing from a sugar high).
- Nut Butter: Provides protein and healthy fats, keeping those little tummies satisfied and happy.
- Toppings: Get bonus points for any nuts and seeds you add, giving an extra crunch and a sprinkle of nutrients.
These rolls might just be the healthiest sushi you ever made without the need for a sushi mat—no seaweed required!
Involving the Kids: Make It a Family Affair
Now, listen here, dear friends—if you want your grandkids to love cooking, you have to let them dive into the fun! Here are a few tips to get them involved in making these Banana Sushi Rolls:
- Let Them Choose: Give them a chance to pick their nut butter and toppings. Kids are more inclined to eat what they’ve contributed to, and they’ll proudly show off their delicious creation!
- Measuring and Mixing: Let them measure out the nut butter or mix the toppings in a bowl. It’s good practice and a great way to sneak in some math skills!
- Get Artsy: Encourage them to create designs with the toppings. Who says sushi can’t be a canvas? After all, it’s not just food; it’s an edible art project!
- Fun with Freezing: If you decide to freeze the rolls, make it like a science experiment—check them after an hour to see how they’ve changed!
Final Thoughts: Snack Time Magic
At the end of the day, it’s not just about whipping up something tasty; it’s about making memories in that warm, bustling kitchen of yours. You know those sweet little faces will light up when they see what they’ve created together. Before you know it, snack time could become the most anticipated time of the day!
So, channel your inner chef, grab those bananas, and let’s roll with some delicious and nutritious Banana Sushi Rolls. Here’s to happy snacking, wonderful memories, and a little bit of chaos that makes it all worth it!
And remember, if you drop a banana or two—it’s just a little extra fun! 🍌🎉
If you loved these delightful Banana Sushi Rolls, why not bring joy to your kitchen by giving them a try? Snap a pic of your creations and tag me to share the fun! And don’t forget to follow me for more kid-approved treats that will keep those little ones smiling and your kitchen bustling! Let’s turn snack time into an adventure!